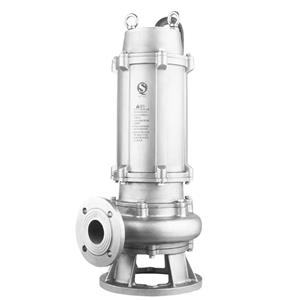
Chemical pump disassembly steps
The disassembly steps of chemical pumps usually include the following key steps, which are designed to ensure the safety of the disassembly process and the convenience of subsequent assembly:
1. Preparation
Ensure safety: First, make sure that the pump has stopped running and cut off the power supply to prevent accidental startup.
Prepare tools: Prepare necessary disassembly tools, such as wrenches, screwdrivers, special disassembly tools, etc., and ensure that the tools are neat and intact.
Marking positions: Mark the fasteners and connectors on the pump body so that they can be accurately reset during subsequent assembly.
2. Empty the medium in the pump
Exclude the medium: If the pump contains liquid or gas, it is necessary to empty the medium in the pump first to avoid leakage or contamination during the disassembly process.
3. Remove external connectors
Remove the inlet and outlet pipes: Use tools such as wrenches to remove the inlet and outlet pipes of the pump and external connectors such as the heating steam pipeline.
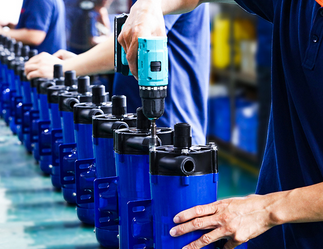
Remove fasteners: Gradually loosen and remove the bolts, nuts and other fasteners on the pump body, such as the connecting bolts between the pump casing and the pump cover, the pump casing and the bearing seat, and the sealing box and the pump casing.
4. Separate the pump body from the internal components
Remove the pump cover: After removing all the connecting bolts, carefully separate the pump cover from the pump body.
Remove the impeller: Loosen the locking nut (usually a left-hand thread) and the anti-rotation nut, and then remove the impeller. Be careful to keep the relative positions of the parts and mark them.
Remove the seal: If the pump body is equipped with seals (such as mechanical seals, packing seals, etc.), you need to remove them according to the corresponding disassembly method. For mechanical seals, you may need to remove the rear gland on the seal box before taking out the seal.
5. Disassemble other internal components
Remove the bearing: If you need to replace or inspect the bearing, you can further remove the bearing seat and bearing. Be careful to keep the bearing clean and intact.
Separate the pump shaft: When necessary, you can use tools such as a tap hammer or a rubber hammer to help separate the pump body and the pump shaft. Be careful to protect the pump shaft from damage.
6. Cleaning and inspection
Cleaning parts: Use alcohol or other detergents to clean the removed parts to remove oil and impurities. For locations that have been scaled after long-term use, you can use tools such as sandpaper to clean them.
Check parts: Carefully check the wear and damage of each part, and replace or repair it if necessary.
7. Record and organize
Record data: During the disassembly process, carefully record the original data and key parameters, such as the tightening torque of fasteners, the installation position of seals, etc.
Organize tools and parts: Arrange the disassembled tools and parts and place them in the designated location to avoid loss or confusion.
