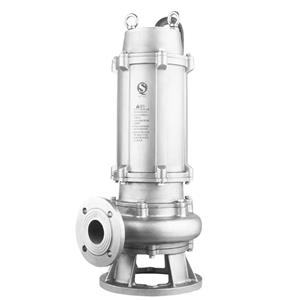
Disassembly and assembly of chemical pumps
The disassembly and assembly of chemical pumps is an important part of chemical equipment maintenance and needs to be carried out in accordance with standard procedures to ensure the integrity of the equipment and subsequent normal operation. The following is a detailed description of the disassembly and assembly of chemical pumps:
Disassembly of chemical pumps
Preparation:
Make sure the pump has stopped running and cut off the power supply to prevent accidental startup.
Prepare necessary disassembly tools and protective equipment, such as wrenches, screwdrivers, special disassembly tools, gloves, goggles, etc.
Disassembly steps:
Loosen the connecting bolts: First loosen the connecting bolts between the pump casing and the pump cover, the pump casing and the bearing seat, and the sealing box and the pump casing, and remove the corresponding parts.
Remove the impeller: Loosen the locking nut (usually a left-handed thread) and the anti-rotation nut, and then carefully remove the impeller. Pay attention to keep the relative position of the parts and mark them for subsequent assembly.
Remove the seal: Unscrew the rear gland on the sealing box and remove the K-ring or other seals. These seals may require special care during disassembly to avoid damage.
Continue to disassemble: Continue to disassemble other parts of the pump, such as bearings, shafts, etc. as needed. During the disassembly process, the original data should be carefully tested and recorded for subsequent analysis and maintenance.
Notes:
During disassembly, follow the procedure and try not to disassemble unnecessary parts.
During disassembly, carefully test and record the original data.
The relative positions of the parts should be marked and placed in order.
The bolts should be disassembled symmetrically to prevent deformation.
When disassembling, try to use special tools to avoid damage to parts.
Assembly of chemical pump
Preparation:
Make sure all parts have been cleaned and inspected.
Prepare necessary assembly tools and auxiliary materials such as lubricating oil.
Assembly steps:
Install the bearing: Install the bearing in the bearing seat, paying attention to the bearing model and installation direction. For bearings that need to be hot-mounted, they should be heated to an appropriate temperature before installation.
Install the impeller: Install the impeller on the shaft and fix it with a locking nut and an anti-rotation nut. Pay attention to the installation direction and tightening torque of the impeller.
Assemble the pump casing: Assemble the pump casing with the bearing seat, sealing box and other components, and tighten the connecting bolts. During the assembly process, ensure that all joint surfaces are tightly fitted and coated with an appropriate amount of lubricating oil.
Install the seal: Install the K-shaped seal or other seal in the seal box and ensure that its sealing performance is good.
Debugging and inspection: After the assembly is completed, debug and inspect the pump. Check whether the pump runs smoothly, whether the seal is reliable, and whether there is leakage.
Notes:
Follow the standard procedures during assembly to ensure that each step is correct.
The mating surfaces of the parts should be coated with an appropriate amount of lubricating oil or engine oil to reduce friction and wear.
During the assembly process, it is strictly forbidden to scratch or damage the surface of the parts to avoid affecting the assembly quality and service life.
After the assembly is completed, a comprehensive debugging and inspection should be carried out to ensure that the performance of the pump meets the requirements.
