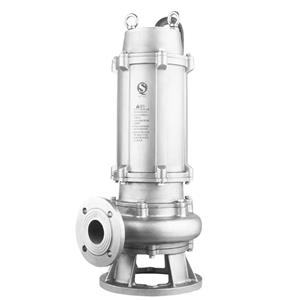
Installation and commissioning of submersible pumps (submersible motors) for wells
The installation and commissioning of well submersible pumps (submersible motors) is a process that requires meticulous operation. The following are the installation and commissioning steps and precautions compiled based on information from multiple sources:
1. Preparation before installation
Check the well conditions:
Check the well diameter, verticality, well wall quality, static water level, dynamic water level, water inflow and water quality conditions of the well to ensure that they meet the use conditions of the submersible pump.
For newly drilled wells, well washing operations must be carried out to remove mud and sand in the water to prevent clogging of the submersible pump.
Check the power supply system:
Confirm whether the power supply equipment and power supply lines can ensure the normal operation of the electric pump.
Check whether the power supply voltage and frequency meet the use conditions of the submersible pump.
Prepare tools and materials:
Prepare various installation tools, such as tripods, lifting chains, clamps, wire ropes, wrenches, screwdrivers, megohmmeters, pressure gauges, etc.
Ensure that the lifting tools are safe, reliable and easy to use.
Read the installation instructions:
Be familiar with the installation instructions of the submersible pump and understand the installation steps and precautions.
2. Installation steps
Check the submersible pump:
Check whether the submersible pump rotates flexibly and without dead spots.
Remove the water filter, open the exhaust and water injection plugs, fill the motor cavity with clean water, pay attention to prevent false fullness, and check whether the motor parts are leaking.
Use a 500-volt megohmmeter to measure the motor insulation resistance, which should be no less than 150 megohms.
Install the protection switch and starting equipment:
Equip the protection switch and starting equipment, check whether the water in the motor is full, and tighten the water injection and venting hole bolts.
Instantly start the motor (no more than 1 second), check whether the direction of the motor is the same as the direction sign, if the opposite, swap any two connectors of the power supply.
Assembly and hoisting:
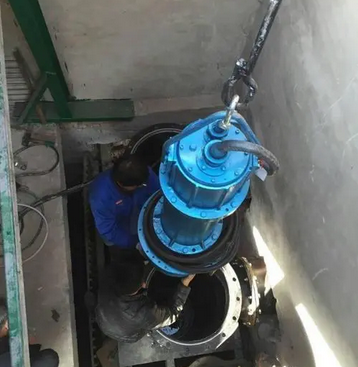
Install a short water pipe at the water outlet of the pump, and clamp it with a splint and lift it into the well, so that the splint is located on the well platform.
Clamp and hoist each section of the water pipe with a splint in turn, connect each section of the water pipe with bolts and nuts, and seal it with rubber pads.
The cable should be fixed in the groove on the flange of the water pipe, and each section should be fixed with a rope. Be careful when going down the well and do not damage the cable.
After the submersible pump and water pipe are all down the well, fix them on the wellhead with a splint, and install the well cover, elbow, gate valve and other accessories.
3. Debugging and inspection
Check the cable and connector:
Carefully check whether the cable and connector are bruised or damaged, and bandage them in time if any problems are found.
Test the submersible pump:
Power on to test whether the submersible pump can operate normally, and observe whether the current, voltage, flow and other parameters are normal.
Check whether the water pump has impeller reversal. If there is reversal, adjust the motor wiring.
Check for water leakage:
After the submersible pump has been running for a period of time, check whether there is water leakage at each connection. If there is water leakage, deal with it in time.

