Installation Guide for Centrifugal Pump Units
Installation Guide for Centrifugal Pump Units
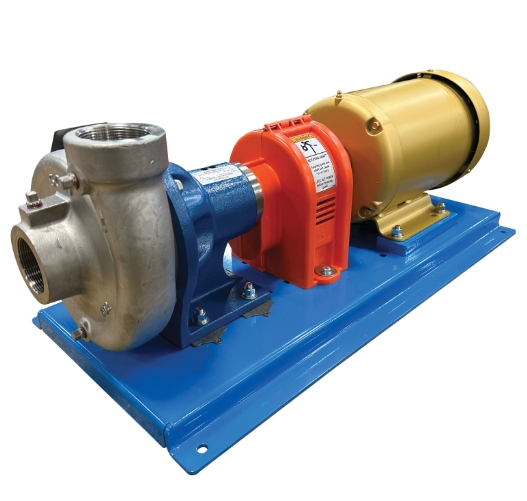
Centrifugal pump units are widely used in various industries for fluid transportation, making their proper installation essential for optimal performance and long-term reliability. This article provides a detailed step-by-step guide to the installation process, ensuring that your centrifugal pump operates efficiently and safely.
1. Preparation Before Installation
Before beginning the installation, it is crucial to prepare adequately:
Inspect the Pump: Verify that the pump and motor are in good condition, free of damage, and complete with all components.
Review Technical Documentation: Familiarize yourself with the manufacturer’s installation and operation manual.
Select an Appropriate Location: Choose a location that meets the following criteria:
Adequate ventilation for the motor.
Easy access for maintenance and inspection.
A stable, level surface capable of supporting the pump’s weight.
Protection from environmental factors like extreme temperatures and moisture.
2. Foundation and Mounting
A solid foundation is essential to prevent vibration and ensure proper alignment.
Foundation Preparation:
Construct a concrete foundation that is level and free of cracks or defects.
Ensure the foundation is strong enough to support the weight of the pump unit and resist operational forces.
Baseplate Installation:
Place the pump’s baseplate on the foundation.
Use shims or leveling wedges to level the baseplate.
Anchor the baseplate to the foundation using bolts, ensuring it is secure.
3. Pump and Motor Alignment
Proper alignment between the pump and motor is critical to prevent excessive wear and ensure efficient operation.
Preliminary Alignment:
Align the pump and motor shafts visually to ensure they are roughly in line.
Final Alignment:
Use a dial indicator or laser alignment tool to achieve precise alignment.
Check both angular and parallel alignment.
Adjust the motor position as needed to correct any misalignment.
Recheck alignment after tightening all bolts.
4. Piping Installation
Incorrect piping can lead to stress on the pump, causing premature failure.
Suction Piping:
Use a short, straight suction pipe with minimal bends.
Install an isolation valve and strainer on the suction side.
Ensure the pipe diameter matches the pump’s suction port to avoid cavitation.
Discharge Piping:
Include an isolation valve and a check valve in the discharge line.
Ensure the piping is properly supported to avoid stress on the pump.
Pipe Connections:
Use flexible connectors to reduce vibrations.
Avoid forcing pipes into place to prevent misalignment.
5. Electrical Connections
Ensure that electrical connections are safe and compliant with local regulations.
Motor Wiring:
Follow the wiring diagram provided by the manufacturer.
Use appropriately rated cables and connectors.
Grounding:
Properly ground the motor to prevent electrical hazards.
Control Panel:
Install a control panel with overload protection and start/stop controls.
Test the control panel functionality before operation.
6. Coupling Installation
The coupling connects the pump and motor shafts, transmitting power efficiently.
Coupling Assembly:
Ensure the coupling components are clean and free of defects.
Align the coupling as per the manufacturer’s instructions.
Check for Clearance:
Maintain the recommended clearance between coupling halves.
Tighten coupling bolts uniformly to avoid imbalance.
7. Initial Lubrication
Lubricate all moving parts before starting the pump.
Bearings:
Use the manufacturer-recommended grease or oil for bearing lubrication.
Avoid over-lubrication, which can lead to overheating.
Seals:
If the pump uses mechanical seals, ensure they are properly lubricated and seated.
8. Pre-Operational Checks
Before starting the pump, perform the following checks:
Pump Rotation:
Manually rotate the pump shaft to ensure it moves freely.
Verify that the motor rotation matches the pump’s specified direction.
Bolt Tightness:
Check all bolts and fasteners for tightness.
System Integrity:
Inspect the piping and connections for leaks or weaknesses.
Ensure that all valves are in the correct position.
9. Startup and Testing
Once the installation is complete, proceed with the initial startup:
Priming the Pump:
Fill the pump casing with liquid to prevent dry running.
Open the suction valve and partially open the discharge valve.
Startup Procedure:
Start the motor and gradually open the discharge valve fully.
Monitor the pump for abnormal noises, vibrations, or temperature rises.
Performance Testing:
Measure the flow rate, pressure, and power consumption to ensure they meet specifications.
10. Routine Maintenance
Establish a maintenance schedule to keep the pump in good condition:
Regular Inspections:
Check for leaks, unusual noises, and alignment issues.
Lubrication:
Lubricate bearings and seals according to the manufacturer’s recommendations.
Cleaning:
Remove debris from strainers and check valves periodically.
Alignment Checks:
Recheck alignment after significant operation or maintenance.
Conclusion
Proper installation of a centrifugal pump unit is essential to ensure its efficiency, reliability, and longevity. By following the steps outlined in this guide, you can avoid common issues such as misalignment, vibration, and premature wear. Regular maintenance and adherence to manufacturer guidelines will further enhance the pump’s performance and service life.

