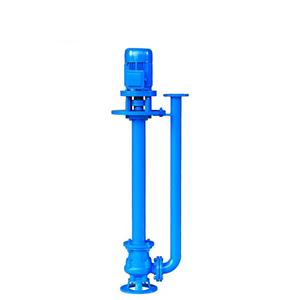
Installation of centrifugal pump outlet check valve
When installing the centrifugal pump outlet check valve, certain steps and precautions need to be followed to ensure its normal operation and expected function. The following are the specific steps and key points for installing the centrifugal pump outlet check valve:
1. Preparation before installation
Determine the location of the check valve:
The check valve should be installed at the discharge port of the centrifugal pump to prevent the medium from flowing back into the pump from the pipeline after the pump is shut down.
At the same time, in order to facilitate future inspection and maintenance, the installation location of the check valve should be easily accessible.

Choose a suitable check valve:
Choose a suitable check valve model and specification based on parameters such as the pump flow rate, pressure and properties of the medium.
Pay attention to factors such as the operating temperature of the valve and the pH of the medium to ensure that the valve can adapt to the working environment.
Prepare installation tools and materials:
Including necessary installation tools and materials such as flange bolts, gaskets, and wrenches.
2. Installation steps
Cleaning the pipe opening and flange surface:
Use a clean cloth to clean the pipe opening and flange surface to prevent impurities from entering the pipeline and affecting the normal use of the valve.
Install the check valve:
Align the flange of the check valve with the flange of the pipeline and tighten it with bolts.
Pay attention to the correct installation direction to ensure that the medium can flow in the design direction of the valve.
Install the shut-off valve (optional):
In order to facilitate the inspection and maintenance of the check valve, a shut-off valve (such as a ball valve or a gate valve) can be installed on its upper part.
The installation position of the shut-off valve should be close to the check valve for easy operation.
Set up a pressure relief drain valve (optional):
For check valves without drain valves, a pressure relief drain valve should be installed between it and the shut-off valve.
In this way, the pressure relief operation can be performed before the check valve is disassembled to ensure safety.
3. Post-installation inspection
Check the installation quality:
Make sure that all bolts are tightened in place and there is no leakage at the flange connection.
Check whether the opening and closing of the valve is flexible and accurate, and there is no stuck, water leakage, etc.
Carry out a trial run:
Carry out a trial run after the installation is completed to observe whether the working state of the check valve is normal.
Pay attention to check whether there are abnormal noises, vibrations, etc., and deal with them in time.
4. Precautions
Follow the installation specifications:
Operate strictly in accordance with the product manual and relevant installation specifications to ensure that the installation quality meets the requirements.
Use appropriate materials and tools:
Choose appropriate flange bolts, gaskets and other materials and tools for installation to ensure a firm and reliable connection.
Pay attention to the installation direction:
Pay special attention to whether the installation direction of the check valve is correct to avoid damage to the equipment and pipeline system caused by the backflow of the medium.
Consider the convenience of maintenance and repair:
During installation, you should consider whether the future maintenance and repair work is convenient, so as to replace damaged or aging parts in time.