Water pump impeller removal sequence
The order of disassembly of the water pump impeller is an important step to ensure the smooth progress of water pump maintenance work. The following is a typical order of disassembly of the water pump impeller for your reference:
1. Preparation stage:
Make sure that the water pump has been powered off and is in a completely stopped state.
Prepare necessary disassembly tools, such as wrenches, screwdrivers, crowbars, etc.
2. Disassemble the bearing components:
Unscrew the bolts on the bearing gland on the discharge side.
Remove the connecting nuts between the discharge section, stuffing box body, and bearing body to remove the bearing components.
3. Disassemble the shaft components:
Unscrew the round nut on the shaft.
Remove the inner ring of the bearing, the bearing gland, and the retaining sleeve in turn.
Remove the packing body (including the packing gland, packing ring, and packing, etc.).
4. Disassemble the sealing and transmission components on the shaft:
Remove the O-ring, sleeve, balance disc, and key on the shaft in turn.
Remove the discharge section, which usually includes the last stage guide vanes, balance rings, and other components.
5. Disassemble the impeller and middle section:
Remove the last stage impeller and key.
Remove the middle section (including the guide vanes).
Continue to remove the impellers, middle sections and guide vanes of the remaining stages in the same way until the first-stage impeller is removed.
6. Further disassemble the bearing components:
Unscrew the connecting nut between the suction section and the bearing body and the bolts on the bearing gland.
Remove the bearing components.
7. Pull out the shaft and disassemble the remaining components:
Pull out the shaft from the suction section.
Unscrew the fixing nut on the shaft.
Remove the inner ring of the bearing, O-ring, sleeve and retainer sleeve in turn.
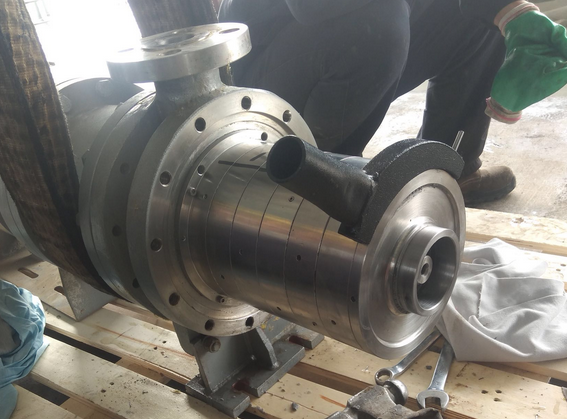
8. Special precautions for disassembling the impeller of a self-priming centrifugal pump:
If the impeller of a self-priming centrifugal pump is disassembled, it is necessary to measure the axial movement and radial runout of the rotor and record the data in time.
When disassembling the impeller back cap, carefully confirm the direction of the back cap. It is strictly forbidden to apply force in the opposite direction to avoid damaging the back cap.
When using a crowbar to pry off the impeller, it should be pried at the ribs of the impeller to avoid cracking the impeller.
Visually inspect the impeller back cap. If there is biting and thread slippage, it should be repaired and replaced in time.
9. Remove the impeller guide flat key:
Remove the impeller guide flat key and check whether the flat key has obvious deformation and missing appearance.
Check whether the fit between the flat key and the keyway meets the specified requirements, and repair or replace it if necessary.
During the entire disassembly process, special attention should be paid to safe operation to avoid accidents. At the same time, the disassembled parts should be placed in order for subsequent maintenance and assembly work.

